Showing posts with label maya. Show all posts
Showing posts with label maya. Show all posts
Saturday, 13 May 2017

Wednesday, 15 February 2017
From Script to Screen: Building up my Pre-vis animatic

This is the build up to my simple exterior shots of the Space Station in my story. I intend it to be pretty basic, but I'd like to know of any thoughts of what I could add or remove building up my shots.

Monday, 30 January 2017
Maya tutorial: Initial Rigging
Starting point of working with rigging and making sure all the controls work as supposed to.
Sunday, 24 April 2016
Fantastic Voyage: scene models


Experiments in early stage Zika virus cell textures


First scene model
Monday, 18 April 2016
Fantastic Voyage scene progress
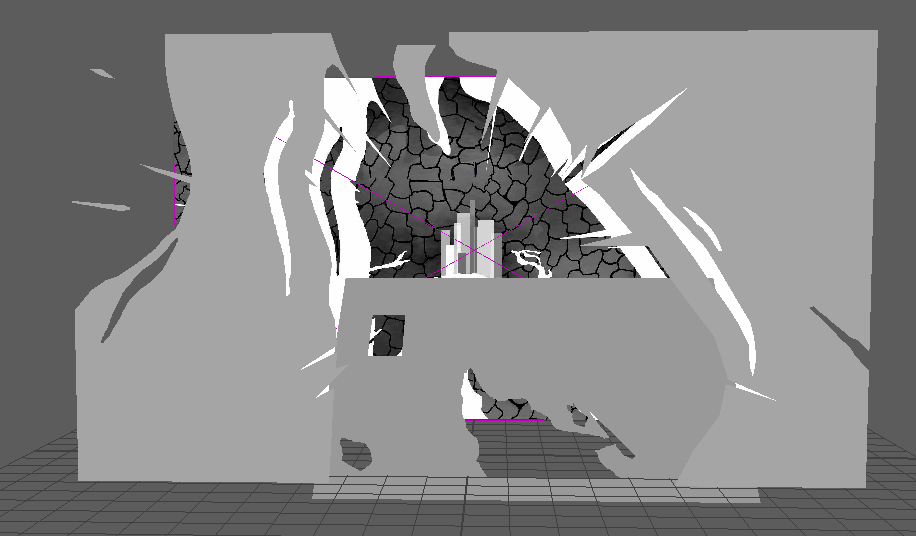
After my first attempt at the scene (see below), I decided to simplify the modelling to cut down on time, but I'll still be adding 3D elements to the scene in the background and foreground.

Monday, 22 February 2016


Monday, 15 February 2016
Maya Tutorial: Creating Model Environments

As preparation for creating a Pre-vis animation, part of the practice was to create a low polygon room that could built from simple shapes. The aim is to keep the polygon count low, but still readable as shapes.
Tuesday, 26 January 2016
Maya Tutorials: Distance and Tracking, Camera Shake and Contra Zoom Pre-Vis
Distance and Tracking: Close up
Distance and Tracking: Mid Shot
Distance and Tracking: Long Shot
Camera Shake: Passing Shake
Camera Shake: Gravitational Jitter
Contra Zoom: Adjusting Focal Length
Monday, 25 January 2016
Friday, 22 January 2016
Saturday, 16 January 2016
Maya Tutorials: Whimsy Kitchen

The Kitchen from the Whimsy House set. I had to add and adjust the lighting angles for an midday glow and decide which way and how intense the light was.
Monday, 11 January 2016
Sunday, 10 January 2016
Maya Tutorials: Texturing and Shading Materials
 |
| Creating shading networks for a double sided shading effect. |
 |
| X-Ray shading adding a change in the opacity. |
 |
| Adding rim light around a character. |
Wednesday, 16 December 2015


Monday, 7 December 2015
Maya Tutorial: Night time scene

A continuation from the cottage lighting scene, being slightly more complicated, changing light sources and depth of shadows.
Tuesday, 1 December 2015
Maya Tutorials: Lighting and Rendering
 |
| Midday Cottage Scene- comprised of two images, the cottage scene and the the background |
This time, the reason for the tutorial is to practice controlling the lighting of a scene and how to effectively cut down on rendering time. The more changes to a scene and higher quality of shots increases the rendering time. In the testing, it was important to bring down the quality of the render to 25% and the lighting to a lower output of shadows. For a full render, I separated the background object from the cottage scene by giving it it's own layer so as to render them on their own. Saving each rendered image as a Tiff file. I was able to combine the images in Photoshop and add edits to the scenes like a Gaussian Blur. In some instances like the 'Romantic scene' I created additional layers to change the blending mode for a better lighting to the scene. For the other scenes of the cottage, I adjusted the colour filter of the scene and lighting for different moods and the colour of the background for different times of day.
 |
| Afternoon Cottage Scene |
 |
| Romantic Cottage Scene |
Monday, 30 November 2015
Maya Tutorial: Digital Set
 |
| Old Alley Way Full Digital Set |
The process of modelling a full set was dictated by a set of orthographs, setting up what the model looks like from the top, side, and the front view. The objects and background were created from simple polygon shapes that were edited and modelled. Walls and blocks had to be cut out, rotated and bend into new shapes and each plank for the crates have been randomised and pulled slightly out of shape to add small details for the authenticity of the scene.

Each piece of geometry needed to have their UV's cleaned for the scene, otherwise for the render the textures would look distorted and facing the wrong way. Even when it may not be visible to be faced with scrutiny, it helped in the long run to sort out all kinks the objects.

The Ambient Occlusion Render acts as the polar opposite to the Glow Matte Pass to add and bring out a little more dirtiness to the scene, for realism. It works with object bump and specular maps which works to make 2D textures stand out and look 3D by working with shadows and light.
 |
| Glow Matte Pass |
 |
| Full Render |
After taking the Ambient Occlusion Render and the Glow Matte Pass into Photoshop, it was a case of tweaking the scene slightly just for more detail. With the Glow Matte Pass, I was able to edit the source of light in my scene and give them more volume with a gaussian blur, which doubles as more realistic glow.
Sunday, 25 October 2015
Maya Tutorial: Animation Recap
Going over basics of animation movement: key framing moments of movements for animation, encoding movement into an object and dynamic effects of movement based on Maya's interpretation of gravity and mass, to simulate a realistic effect.
Maya Tutorial: Batch Rendering

How to effectively and realistically render images in a batch so all frames of an animation form to group to be taken and put together into the models set movement. This process is more useful for creating a Gif or short movie that can be looped rather than creating a more animated but less choppy way of creating animated frames in Maya, which creates a movie with an end point.
Subscribe to:
Posts (Atom)